Have you ever wondered why a simple coffee maker can make or break your morning routine? If you just bought one and are searching for how to use Toastmaster coffee maker, this beginner-friendly guide will walk you through the setup, brewing process, and cleaning steps so you can enjoy a great cup of coffee with confidence.
Getting Started with Your Toastmaster Coffee Maker
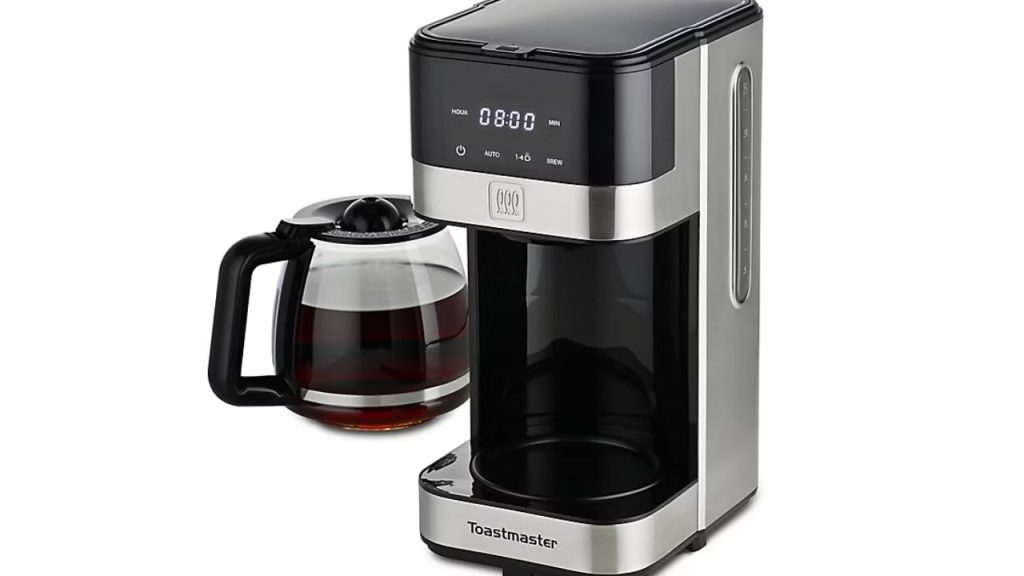
Before you brew your first pot, it helps to understand the basic parts of the machine. Most Toastmaster coffee maker models include a water reservoir, filter basket, carafe, warming plate, and power switch. Knowing where each part is located makes the process easier and helps prevent mistakes.
What You Need Before Brewing
To use a Toastmaster coffee maker properly, gather these items first:
- Fresh coffee grounds
- A paper or permanent filter, if your model requires one
- Clean, cold water
- Your Toastmaster carafe
Always place the coffee maker on a flat, dry surface near an outlet before starting.
How to Use Toastmaster Coffee Maker Step by Step
If you are learning how to use Toastmaster coffee maker for the first time, follow these simple brewing steps.
Step 1: Fill the Water Reservoir
Open the top lid and pour cold water into the reservoir. Use the water markings on the carafe or machine to measure the amount you need. Do not overfill, since that can cause spills during brewing.
Step 2: Add the Coffee Filter and Grounds
Place a paper filter or reusable filter into the brew basket. Add your ground coffee. A common rule is 1 to 2 tablespoons of coffee per 6 ounces of water, but you can adjust based on how strong you like your coffee.
Step 3: Place the Carafe in Position
Make sure the empty carafe is sitting correctly on the warming plate. This step is important because most Toastmaster drip coffee makers will not brew properly if the carafe is not aligned.
Step 4: Turn the Machine On
Close the lid and press the power switch. The brewing cycle should begin within moments. Avoid opening the lid while the coffee maker is running, since this can affect brewing and cause hot steam to escape.
Step 5: Serve and Enjoy
Once the brewing is complete, carefully remove the carafe and pour your coffee. If your model has a warming plate, it can keep coffee hot for a short period, but it is best to drink it fresh for the best flavor.
Helpful Tips for Better Coffee
If you want better results when using a Toastmaster coffee maker, keep these tips in mind:
- Use fresh coffee grounds for stronger flavor
- Clean the machine regularly to avoid buildup
- Use filtered water for a cleaner taste
- Do not reuse old coffee grounds
- Follow the water-to-coffee ratio that matches your preferred strength
These small habits can improve taste and extend the life of your coffee maker.
How to Clean a Toastmaster Coffee Maker
Regular cleaning is just as important as brewing correctly. After the coffee maker cools, discard the used grounds and rinse the carafe and filter basket with warm water. Wipe the exterior with a damp cloth.
For a deeper clean, descale the machine every few weeks using a mixture of equal parts white vinegar and water. Run one full cycle, then follow with two cycles of clean water to remove any vinegar residue.
Final Thoughts
Learning how to use Toastmaster coffee maker is simple once you understand the basic steps. Fill the reservoir, add your filter and grounds, start the machine, and clean it regularly for the best performance. With a little practice, your Toastmaster coffee maker can deliver reliable, flavorful coffee every morning.