Ever wondered why some coffee lovers still swear by the rich, bold flavor of a percolator? If you are learning how to use a percolator coffee maker for the first time, the process is easier than it looks. A percolator coffee maker brews coffee by cycling hot water through the grounds repeatedly, creating a strong, classic cup that many people still enjoy. Whether you are using an electric percolator or a stovetop model, this beginner-friendly guide will walk you through each step.
What Is a Percolator Coffee Maker?
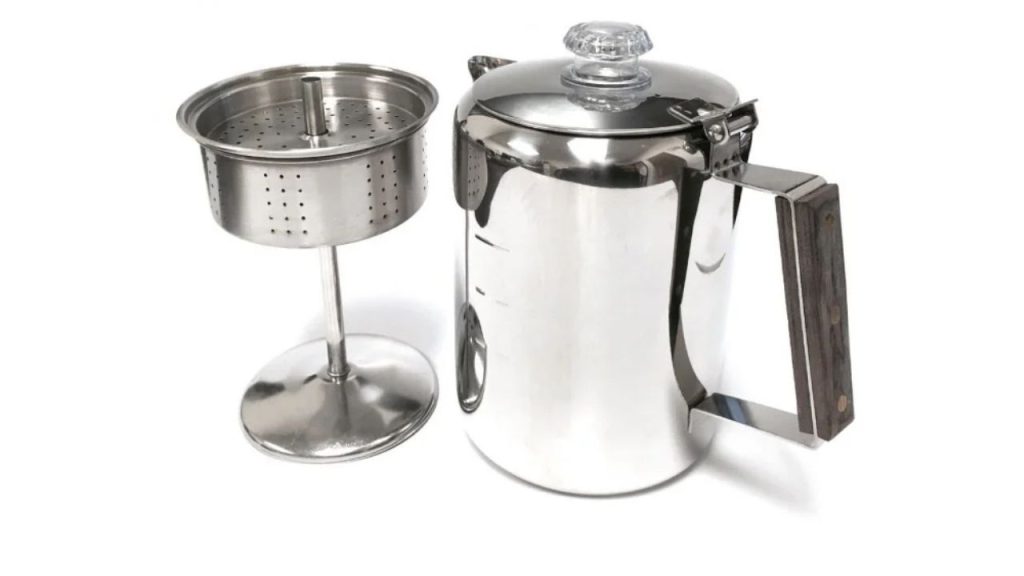
A percolator coffee maker is a simple brewing device that heats water and sends it through coffee grounds using a vertical tube. The brewed coffee drips back into the lower chamber, where it is heated and circulated again until it reaches the desired strength. This method produces a full-bodied, robust coffee flavor that is different from drip coffee or a French press.
How to Use a Percolator Coffee Maker
1. Add Water to the Base
Start by filling the bottom chamber with cold water. Most percolators have a water level indicator inside, so avoid overfilling. Use the amount of water that matches how many cups of coffee you want to brew.
2. Insert the Coffee Basket
Place the coffee basket and stem into the percolator. This is where the coffee grounds go. Make sure all parts are fitted correctly so the water can circulate properly during brewing.
3. Add Ground Coffee
Use medium-coarse coffee grounds for the best results. Fine grounds can pass through the basket and make your coffee gritty. As a general rule, use about 1 to 2 tablespoons of coffee per 6 ounces of water, depending on how strong you like it.
4. Assemble the Percolator
Secure the lid tightly. If you are using a stovetop percolator, place it on the burner. If you have an electric percolator, plug it in and set it to brew.
5. Heat and Brew
As the water heats, it will rise through the tube and bubble into the coffee basket. You may see the clear knob on top begin to pulse or bubble. Once it starts perking, reduce the heat on a stovetop model to maintain a gentle brewing cycle. Overheating can make the coffee taste bitter.
6. Brew for the Right Amount of Time
Let the coffee percolate for about 7 to 10 minutes for a balanced cup. If you prefer a stronger brew, you can extend the time slightly, but avoid overbrewing. Percolators can quickly produce bitter coffee if left on too long.
7. Remove and Serve
When the coffee reaches your preferred strength, turn off the heat or unplug the machine. Carefully remove the basket and stem, then pour and serve immediately for the best taste.
Tips for Better Percolator Coffee
Use fresh, quality coffee beans and grind them just before brewing for better flavor. Clean your percolator after each use to prevent mineral buildup and old coffee residue from affecting taste. Also, use filtered water if your tap water has a strong odor or taste.
Common Mistakes to Avoid
One of the biggest mistakes when learning how to use a percolator coffee maker is using the wrong grind size. Another common issue is brewing too long, which can make the coffee harsh and overly strong. Finally, always avoid high heat, since it can scorch the coffee and reduce quality.
Final Thoughts
Once you understand the basics, using a percolator coffee maker is straightforward and rewarding. With the right coffee grounds, proper water levels, and careful brewing time, you can enjoy a rich and flavorful cup every time. If you are searching for a classic brewing method with bold results, mastering how to use a percolator coffee maker is a great place to start.